FAQ & Support
Answers to common questions, and how to reach us when they don’t cover it.
The app
Do you have a demo?
Kind of. The Mac App Store version of Raw Positive is free to use, and every feature is in the free version. The free version comes with these limits:
- Unlimited JPEG exports at 1280 px on the long edge, sized for sharing on social media
- Four frames in total at full resolution as DNG or 16-bit TIFF, so you can see the full quality for yourself
A one-time, in-app purchase unlocks:
- Unlimited, full-resolution DNG, TIFF and JPEG exports for every frame
- A choice of additional JPEG sizes
Why an in-app purchase?
The in-app purchase is a one-time payment, and it carries over to any Mac signed in to your Apple Account (use Restore Purchase on the new one). Raw Positive has no ads, no account and no data collection, so your purchase is what keeps it going. It lets me continue to grow and support Raw Positive, including the future Windows version. No subscription, ever.
Which file formats does the app support?
Raw Positive supports negatives in raw files from the cameras that LibRaw supports (libraw.org/supported-cameras), except Sigma Foveon (X3F) and GoPro. Raw Positive also has general DNG support, for linear scanner DNGs and Apple ProRAW, to support flatbed or mobile scanning.
Raw Positive doesn’t currently read JPEG or TIFF inputs and only takes raw files as inputs. If you have any questions on input formats beyond this, see the first question above and give the app a try.
How does the conversion process work?
Raw Positive inverts your negatives using the sensitometric data film manufacturers publish for each stock. Your scans’ raw data is kept through every processing stage, and each frame exports as a DNG, a 16-bit TIFF or a JPEG.
- It finds the frame. Each negative is detected, cropped and straightened for you.
- It reads your film base. Raw Positive measures the film base, including the orange mask on color film, from the clear edge of your own negative, then checks it across the whole roll so every frame starts from the same reference.
- It treats black and white as black and white. Black-and-white film is mixed to monochrome before it’s inverted, so sensor noise averages away and only the film’s grain is left.
Everything runs on your Mac. Nothing goes to the cloud.
What about Windows?
It’s coming. The app has been developed in a cross-platform manner, so Windows will be a major focus after the Mac version launches.
What about feature X?
I have a roadmap of features and enhancements that I’d like to build out over time after launch, and the Windows port. That said, if you have ideas that you’d like to see, drop me a line. Just know that the overarching goal with Raw Positive is to get great-looking conversions as fast as possible, and to get you 95% of the way there with as little effort as possible.
Did you use AI to develop this app?
Yes. I’ve been developing software for about 25 years, and I see AI as a tool that gets me to my vision faster. Even with it, I spent nearly seven months making sure the app was well architected, robust, and did what I set out to do. Since I built Raw Positive in my spare time, doing it all the traditional way would easily have taken years. The conversions themselves don’t use AI. They’re built on the film manufacturers’ published data. I’m also a big believer in human-made art, and I hope Raw Positive helps you get out, shoot more film and make more prints.
The scanning process
What is your scanning setup?
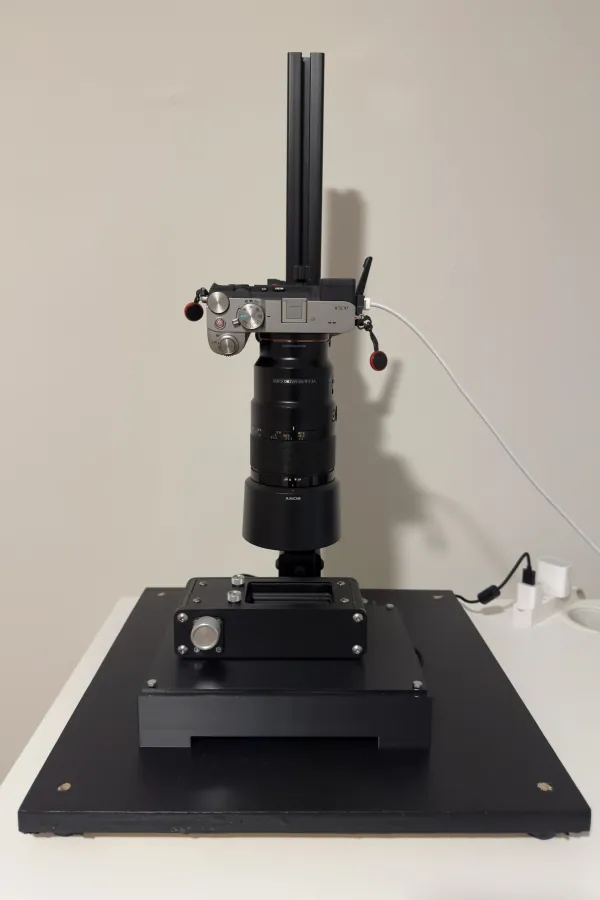
I use a custom copy stand based on this video guide, a Raleno PLV-S116, a 3D-printed light stand, Negative Supply Co’s Pro Film Carrier 35 MK2, a Sony A7CR, and the Sony FE 90mm f/2.8 Macro G OSS.
Prior to the Negative Supply Co carrier, I used the Essential Film Holder. While expensive, I find the Pro Carrier a big upgrade to my process. Its weight and knob mean I’m not having to re-align my scan as I progress through the roll.
Do I need an RGB light source?
Not necessarily. I’ve been happy with the results I get out of my Raleno light (which was recommended at some point by Essential Film Holder). Make sure any light you choose to use has a high color rendering index (CRI).
What should I set for white balance on my scanning camera?
The key is consistency, and balancing your camera’s Kelvin setting to your light source as closely as you can. I set both my camera and light to around 5000K.
The editing process
Do I need to use the exact film I shot?
Absolutely not. There are a lot of variables at play in photography, and experimentation and practice are a big part of the process. In addition to your analog source negative, your scanning camera’s sensor, the brand’s color science, your digital white balance setting, and the color temperature of your illumination light all play a factor in the overall conversion. The film stocks Raw Positive supports cover a wide range of color curves, so experiment and have fun.
Why do the rotation/mirror details differ from what I just entered?
If you use the shortcut keys, those transform the image as you are looking at the frame visually. The displayed contact sheet details and the physical pulldowns are relative to the source negative’s original orientation.
What’s the difference between the Negative and Positive adjustments? When should I use each?
Negative Adjustments work on the negative itself, before it’s turned positive. Positive Adjustments work on the finished picture, like the sliders in any photo editor.
- Negative Exposure corrects how the negative was exposed in the camera. It re-exposes the frame through the film’s own curve, so highlights roll off the way film does instead of clipping, and shadows open up. It only changes tone, so your white balance stays where it was.
- Negative Contrast changes how contrasty the negative itself is. On black and white it works like developing the film longer or shorter. On color it pivots around the mid-tones, so they keep their brightness.
- Exposure and Contrast under Positive Adjustments change the final picture’s brightness and contrast, the same way they would in Lightroom or Photos.
As a rule of thumb, start with the negative. If you over- or underexposed a frame when you shot it, try Negative Exposure before reaching for Exposure. Use Negative Contrast to set the film’s overall look, and the positive sliders for the final touch.
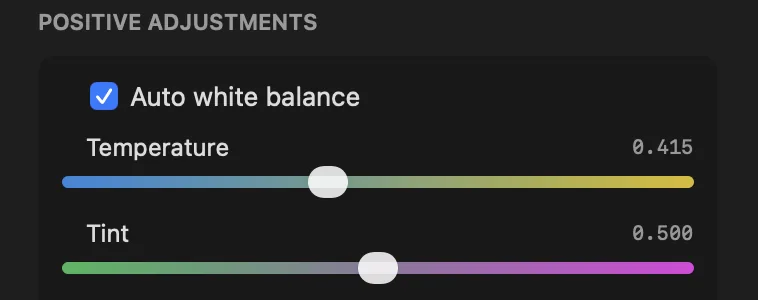
Why don’t the temperature/tint sliders move when Auto White Balance is on?
When that checkbox is selected, the sliders become relative to the auto position.
What does “Apply roll’s average negative correction” do?
Normally Raw Positive works out each color frame’s inversion from that frame alone. With this box checked, the frame uses the average from the whole roll instead. Turn it on when one frame comes out a different color from its neighbors, which often happens with fog, night shots or frames filled with one color. You can also turn it on for a whole roll shot in the same light so every frame matches. Leave it off for rolls shot in mixed light, where the average won’t suit any of them.
Support
If the questions above didn’t answer yours, or you need assistance, contact us:
Anything you send is used only to help you and to improve Raw Positive. See the privacy policy for details.